What You Need in Your Kitchen Most, According to Cookbook Authors

“Kitchen shops today are wonderfully exciting places to browse through,” the Boston Globe Cookbook stated, somewhat unhelpfully, in the 1980s. It’s a reminder that there was a time not long ago when cookbook authors were loathe to tell readers how to outfit their kitchens.

“Cooking utensils and equipment are extremely individualistic and personal items,” the Globe cookbook continued, devoting only a single paragraph to the type of gear a cook might need. In fact, readers were told to figure out what they needed, buy the best they could afford, and put it to good use—advice that seems as foggy as Boston Harbor in January.

How things have changed. Cookbooks are no longer simply instruction manuals focused on recipes. These days, authors are recommending the gear and ingredients to buy in order to achieve the best results.

“The recipes in this book are designed to increase the tools in your tool box, one by one,” declares Greg Wade, author of Bread Head and the James Beard Award-winning managing partner at Chicago’s Publican Quality Bread.

Wade is among the authors and chefs who devote ample space in their books to guiding readers toward the ideal gear and ingredients. Sometimes, these suggestions come early in the book, before they get down to recipes; other times, they’re tucked in the back.

I looked through five cookbooks published this year to see how their recommendations compared with each other. Those cookbooks are:

Here’s what today’s cookbook authors want you to keep stocked in your kitchen.

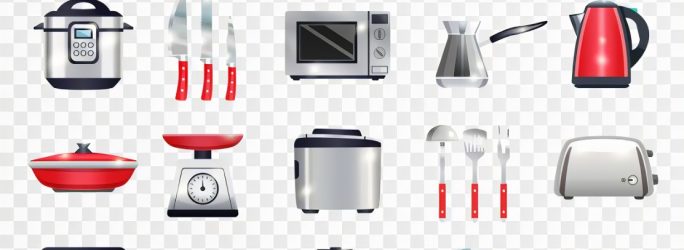
Basic kitchen equipment

Each of these cookbooks includes a section on the type of cooking equipment (or, in Hirsch’s case, drink mixing accessories) that you should have on hand before you plunge in.

Crapanzano and Wade agree that fledgling bakers need to have a stand mixer, kitchen scale, and an oven thermometer. Wade wants bread bakers to have a clay baker or a cast iron bread pan. Crapanzano lobbies for loaf pans in a standard (8 1/2 by 4 1/2 inches) and large size (9 by 5 inches) as well as round cake pans that are 8, 9 and 10 inches around.

Hirsch thinks a basic bar should have a two-ounce jigger, a shaker, stirring glass (so you drinks can be either shaken or stirred), three kinds of strainers, a muddler, and a selection of glassware.

The most important pantry items

With a magazine, radio program, television show, and online instruction in the vast Milk Street portfolio, Christopher Kimball’s enterprise keeps a pantry in Boston that’s constantly stocked with essentials like canned tomatoes, tuna, grains and beans. But Kimball says those kitchen heroes “sometimes need a little help.”

Cook What You Have includes a list of 25 essential ingredients Kimball thinks home cooks should have on hand, such as anchovies, bacon, capers, sesame seeds, tahini, and plain rice vinegar.

Bhatt does him one better. I Am From Here includes three pages of recommended spices as well as recipes for making the spice blends used in his recipes. He also counsels cooks to have a supply of peanut or canola oil, and they’ll need a stock of rice. He prefers basmati because of its aromatic quality, but any long-grain rice should do.

This shopping list might seem daunting if you are new to the Indian-Southern fusion style in Bhatt’s book, so he helpfully provides a short version.

“Don’t let a missing ingredient stop you from trying a recipe,” Bhatt writes. “In most recipes I suggest the best pot or pan for the task at hand. If that’s not on your shelf, use what you have and cook on.”

The best type of flour, according to the experts

These cookbooks offer a way for you to sample that the end result is supposed to taste like, even if you can’t visit Bhatt in Oxford, Mississippi, take home Wade’s bread from Chicago, or catch up with Crapanzano in Paris or New York. These writers all have a key ingredient in common: top-quality flour.

Reflecting the wide range of his recipes, Wade shares his thoughts on different kinds of grains—rye, millet, buckwheat, rice, corn, sorghum, spelt, oats, and, naturally, wheat. Then within wheat, he expounds on cake flour, pastry flour, all-purpose flour, bread flour, and high-gluten flour.

Since Crapanzano focuses primarily on cake, her flour selection includes all-purpose, cake, and nut flours (almond and hazelnut, which she keeps in her freezer). Crapanzano cautions that American flour and French flour are different: There is no such thing as all-purpose flour in France, and cake flour and pastry flour are different things. To keep things approachable to the average baker, she sources her flours from King Arthur Baking.

Bhatt makes a case for keeping chickpea flour on hand—“I love its nutty flavor,” he writes. Often, chickpea flour is available in coarse and fine grounds. If you have a choice, opt for fine.

How cookbooks offer variations on a theme

Beyond their suggestions for particular pantry items and kitchen tools, these books share one reassuring similarity: They present basic recipes, then offer variations so that the user can dress them up as they see fit.

One of the first recipes I learned to make from my French family was the classic yogurt cake, in which a small yogurt container is used to measure things like flour, sugar, milk, and, of course, yogurt. Crapanzano goes a step further with more than a half dozen versions of yogurt cake, including flavors such as orange, almond, lemon, and menthe, and she has a yuzu version, too.

Bhatt actually organizes his book by ingredient, so you’re getting numerous suggestions for what to do with, say, your tomatoes, including multiple soup recipes, Turkish tomato salad, tomato chutney, and his tasty green tomato pie.

Right on his book jacket, Kimball tells readers they’ll be able to “make a meal out of almost anything.” And he proves it by showing how frozen corn and green peas can be transformed into Japanese-style rice or a delicate risotto. Unlike the aloof cookbook authors of the past, you get the feeling that Kimball would walk you right to the freezer section and start tossing bags into your cart—just as Wade would guide you to the right flour, or Crapanzano would cheer you on making a dinner party yogurt cake, exactly as you deserve.

Building Chicken Coops the Easy Way

There are thousands of plans, designs and ideas for buildings used in housing chickens. They range from elaborate two story structures right on down to a small doghouse type dwelling surrounded by a few feet of chicken wire. Before you invest a lot of money and time setting up costly coops, learn about building chicken coops the easy way and you can enjoy the fruits of your labor sooner.

Chickens are not demanding critters. Their needs are pretty basic. They need a place to get in out of the elements where the freezing weather won’t harm their eggs. Next on the list, they have to have space for their nests in order to lay eggs.

Since both eggs and chickens are considered tasty morsels by a wide variety of predators, the place built for chickens needs to be sturdy and well protected. Add a little food and water and they’re happy campers.

There are standard ways to build a chicken coop or you can create your own from scratch. Decide how large the dimensions should be for the area set aside for the chicken coop.

Take care not to put a chicken coop too close to your home for a couple of reasons. The noise can get pretty loud at times and downwind, a chicken coop doesn’t smell like roses. On the other hand, you don’t want to put the coop too far away either – both for the sake of convenience and so that you can keep an eye out for predators.

No matter how fancy a chicken coop is, don’t forget that it has to be cleaned on a regular basis to cut down on odor and bug infestations. One of the mistakes those new to raising chickens do is they build coops where the floor is completely level.

Isn’t that the way to build a house? Yes, but not a hen house – because when you go to wash it out, all of that stuff will pool right at your feet. Not a pretty thought or sight. Instead, you want to build the floor with a tilt at the back of it.

Building a chicken coop the easy way includes an easy clean up. With a slightly tilted floor at the rear of the house, when you spray it down during cleaning, all that icky stuff will wash down the slant and right out the back door of the coop.

Put a chicken wire fence all around the coop to keep unwelcome guests out. Remember that some animals will dig beneath fences to get into the chicken coop, so play it smart and bury the fence partly below the ground. Building chicken coops the easy way makes the work of owning chickens easier in the long run.

Buy a Rabbit Hutch and Run Together to Save Money

Your pet bunny will need a rabbit hutch and run so that he can have both the comfort and the exercise he needs. If you buy both together, you’ll end up saving money in the long run.

Even though many hutches are quite large, for their physical and emotional, rabbits need to be able to move freely about. They need to have that freedom yet at the same time, because they are small animals that can be targets for other animals such as cats or foxes, so they must be protected. They also need that fresh air and sunshine.

It’s never a good idea to let a bunny alone in a yard. Don’t make the mistake of thinking that you can take your pet out of a hutch and turn him loose in a fenced in backyard and he’d be fine.

Predators can get over or under a fence to get to a rabbit. The purpose of a rabbit run is to keep him safe from harm. The run is usually made of wire mesh or chain link fence material. The spaces between the wire are made so that the rabbit can’t get a foot caught up in the wire.

When you get a rabbit hutch and run check with the manufacturer details on the kind of lumber or other materials that were used to make the run. Know ahead of time what’s safe for your bunny to be around and what’s not since some wood is toxic to a rabbit.

A good wood to use in a run is fir wood that’s not been treated with any kind of sealant that has a noxious fume to it. You’ll want the run you purchase to have an access door for you to be able to get to the bunny easily but you’ll want that door to be sturdy enough so that if he pushes against it, the latch won’t spring open.

A run that’s too small defeats the purpose. A good rule of thumb to follow when considering what size run to get is to make sure it’s at least twice the size of a medium hutch, which would be about 36 inches in width.

Some runs come with flooring but most do not which allows owner to simply move the hutch to a new area in the yard if the ground becomes muddy or is no longer suitable for the pet.

Having flooring on a run is a matter of personal preference but being able to nibble on untreated grass and be on a natural setting is more of a treat for the bunny than using synthetic means.

Your pet needs both a rabbit hutch and run already in place before you bring him home. He’ll want to familiarize himself with his surroundings and the sooner he learns he’s home, the more secure he’ll feel. Buying a hutch and run that you can just assembly can give you that convenience factor as well as save you money.

Easy Herbs for Beginning Herb Gardeners

Beginning herb gardeners may worry about which types of herbs they should grow. There are many different herbs available, and some are more difficult to grow than others. There are a few types of herbs that are especially easy to grow for beginners. These are generally more hardy plants that don’t require a lot of fertilizer or special work.

Parsley – Parsley is a relatively hardy annual in zones 2-11. Both flat-leaf and curly varieties are easy to care for and grow very well without a lot of extra care. It can do well in full sun to light shade, and needs rich soil that is well-drained but moist. It doesn’t do particularly well in heat.

Cilantro – Also known as coriander – this annual herb doesn’t need exceptionally rich soil, and isn’t extremely particular about sun and shade. It can do well in full sun or light shade. It is relatively easy to care for, and does well in almost all zones.

Chives – Chives are a perennial herb. Chives can grow well in almost any soil, and almost any conditions. Chives have been known to be seen growing in old gardens that haven’t been tended in many years! It’s hardy in zones 3-9, and prefers full sun. It does do better in rich soils, but doesn’t need it to survive. Chives have a rich, oniony flavor, and they taste great on baked potatoes.

Oregano – This herb is an extremely popular herb, and it goes well with many different types of foods. It is commonly used in tomato-based pasta dishes, chicken dishes, and pork dishes. Hard in zones 5-9, oregano does well in raised beds, rock gardens, alongside roads or pathways, or just about anywhere! It needs full sun and well-drained soil, but it actually does better in poor, rocky soil!

Thyme – Thyme is a perennial herb. It is hardy in zones 4-6. It’s a small, shrub-like herb that requires full sun and moist, well-drained soil. It is quite hardy in its standard zones, and doesn’t require much care at all.

Basil – Basil in a warm-weather annual herb. It is hardy in most zones, but it requires hot, dry conditions to reach peak flavor. It needs full sun, and very rich, moist soil. The only major issues with growing basil are slugs and cool conditions. As long as basil has enough light and heat, and its soil is allowed to dry out between waterings, it usually requires little additional care.

Bay – Although it is a type of shrub, this is actually a very good herb for beginners to grow. It’s hardy in zones 8-11, and is remarkably hardy in those zones. It needs full sun to light shade, and rich, well-drained soil. It will tolerate variations in conditions rather well. Just remember, bay leaves reach their full flavor when dry, so be sure to press them between layers of paper towels inside heavy books for a few weeks before you use them.

Remember to be careful about the zones. Although many of these herbs are hardy, they do much better when kept to their hardiness zones. As long as you grow them in the zones in which they do best, most of these herbs will be very easy to care for, and shouldn’t need a whole lot of extra work to take care of them.

Ten Great Vegetables for Home Vegetable Gardens

It’s sometimes recommended that you don’t try to grow vegetables that are readily available at your local supermarket. If a particular vegetable is inexpensive, you might want to skip growing it and just purchase it.

Of course, it can be difficult to find good quality in some types of vegetables, so if there is a big difference in quality, that could be a great reason for growing that type.

Tomatoes – Although technically a fruit, its savory nature leads to this little beauty being considered a vegetable by most people. Tomatoes found in stores are usually picked nearly green and then ripened artificially.

This is done to ensure they are tough enough to survive shipping without being smashed, and so they last longer on the shelves. Since tomato quality can be really poor in stores, this is a very good choice. Tomatoes are the most popular choice for vegetable gardeners, because they probably have the most noticeable difference over store bought.

Lettuce – Although iceberg lettuce doesn’t very that much from store to home, leaf lettuces and other fancy lettuces can taste much sweeter and crisper if grown at home. Plus, exotic lettuces can often be very expensive.

Peas – Peas can be very hard to find fresh. Canned peas are often mushy, and although frozen peas are certainly better than canned, they still pale in comparison to fresh peas. Tiny baby peas are sweet, delicate, and delicious, making them well worth the effort.

Carrots – Store bought carrots are often woody, tough, and bitter. Even organic carrots often carry a strong bitterness caused by being kept at temperatures that are too cool for too long. Fresh carrots are generally very sweet and delicious.

Radishes – Radishes are cheap and easy to find in stores, but most store bought radishes are already turning pithy. If you’ve ever bitten into a radish that was dry and spongy inside, you’ll understand how bad pithy radishes are. Fresh radishes are delightful!

Greens – Although most greens are readily available in stores, they’re often yellowing and wilted by the time you buy them. By growing them yourself, you can be sure you have fresh greens when you want them.

Asparagus – Fresh asparagus is often ridiculously expensive, and canned asparagus is mushy and horrible! The only way to get affordable asparagus that isn’t mushy and bland is to grow it yourself.

Peppers – Peppers in stores are often shriveled and pathetic. Plus, peppers that aren’t standard green peppers can often be very expensive. My local store has sold red peppers for as much as $2.99 each, which is crazy! Grow your own and save money.

You Can Have Backyard Chicken Coops Even in the City

Have you always wanted to have backyard chicken coops but thought you couldn’t since you live in the city? While there are some cities that don’t allow any type of farm animal, many cities do and you’re allowed to have chickens.

However, some of these cities that allow chickens to be kept do not allow roosters due to the crowing and complaints from neighbors. You’ll want to check with your city to make sure you’re not breaking any animal nuisance laws.

The reasons for keeping chickens vary from wanting fresh eggs to wanting a different kind of pet to desiring a bit of the country in the city. Not only can there be a savings on the grocery bill by producing eggs for family use, but many neighbors are joining together to create chicken projects. They’re splitting costs of the materials to build the backyard chicken coops as well as the cost of the feed and incidentals.

If you figure that you want to have a coop for hens of your own, they’re not at all difficult to build, plus you can design your own plans to make the coop look like a little house or barn rather than the traditional coop you may remember. All it takes is a little planning before you get started.

You’ll need to make sure you plan enough space for each chicken as over crowded conditions can lead to sickness among the chickens. The general rule of thumb for space is to have approximately four square feet of space for each chicken though it never hurts to have more. As you’re building the chicken coop take into consideration the area where you live.

If you live in a northern state where snow and ice are a regular part of the weather, you’re going to need a coop that’s adequately insulated to keep the chickens warm. You don’t want to have to bring them indoors for them to survive. If you happen to live in an area where the winters are not as harsh, but the summers are scorchers, you’ll have to make sure the coop is built to provide maximum cooling.

When building the home for your chickens, you don’t have to spend a lot of money buying brand new materials. You can build it from recycled materials, such as wood left over from a home project – even hinges salvaged from old kitchen or bathroom makeovers can be put to use as hinges for a chicken coop door.

Whatever materials you use to build your backyard chicken coops, make sure you’ve provided good ventilation in the snug home for your chickens otherwise you can get an ammonia build up that’s not good for you or the chickens.

1 2 3
This is an example of popup. Please create your custom popup inside your admin panel. Go to Settings > Right Click Popup
Powered by Right Click Popup