
7 Mouthwatering Cast Iron Dutch Oven Recipes to Try Now
It’s time to get your kitchen ready! If you’re looking for a way to add some new flavors to your kitchen, the cast iron dutch oven is the perfect tool. These trusty kitchen tools are versatile and easy to use, and can help you create mouthwatering dishes that will be sure to please. From hearty stews to creamy casseroles, it’s no wonder why these ovens have been around since the 1800s. Today, there’s an abundance of recipes out there that incorporate a cast iron dutch oven. It doesn’t matter if you’re a novice or an experienced chef, you’ll be able to find something exciting to try. Even better, you can learn a few tips and tricks along the way. In this post, we’ll be taking a look at 7 delicious cast iron dutch oven recipes that you can make right now. Not only are they all easy to prepare, but they’re packed with flavor. So put on your apron and get ready to create some amazing dishes in the comfort of your own home.
What’s So Special About Cast Iron Dutch Ovens?
Cast iron dutch ovens are the perfect tool for a variety of cooking tasks. Whether you’re baking bread, simmering a hearty soup or stew, or braising a cut of meat, cast iron dutch ovens are the ideal choice for any gourmet or home cook. Cast iron is a sturdy, durable material that can withstand high temperatures, making it the perfect choice for cooking in the oven or even over an open flame.
These timeless kitchen tools can last you a lifetime, with care. The cast iron retains heat well and is designed to evenly distribute heat, ensuring your food cooked to perfection. The heavy cast iron lid locks in moisture as your food cooks, resulting in tender, juicy, flavorful dishes every time. It’s also incredibly versatile. You can use it to create casseroles, roasts, soups, stews, and even desserts like cobblers and bread puddings.
When it comes to cast iron dutch oven recipes, the possibilities are endless. If you’re looking for a hearty meal, try a classic beef stew or a slow-cooked pork roast. For a lighter dish, try a vegetable-packed stew. If you’re in the mood for something sweet, try a decadent apple cobbler or a rich chocolate bread pudding. The beauty of cast iron dutch ovens is that the slow-cooking process allows all the flavors to meld together perfectly.
Not only are cast iron dutch ovens perfect for cooking, they’re also incredibly easy to clean and maintain. After you’re done cooking, simply wash the pot with hot, soapy water and dry it thoroughly. Be sure to season the pot with oil after each use to keep it looking its best and prevent rusting.
If you’re looking for a timeless kitchen tool that will last a lifetime, look no further than cast iron dutch ovens. They’re perfect for creating a variety of delicious dishes and are incredibly easy to clean and maintain. With so many delicious cast iron dutch oven recipes to choose from, you’ll never run out of ideas for your next meal!
Roasted Garlic and Herb Chicken
One of the most delicious cast iron dutch oven recipes you can make is roasted garlic and herb chicken. This dish is sure to become a family favorite. It’s simple to prepare and requires minimal ingredients.
To start, you’ll need one whole chicken. Rinse the chicken off and pat it dry. Place the chicken into the dutch oven and season it with salt, pepper, and your favorite herbs. Popular herbs to use are rosemary, thyme, and oregano. For a flavor boost, add crushed garlic cloves.
Next, you’ll want to pour in enough liquid to cover the chicken. This can be water, vegetable stock, or chicken broth. Cover the dutch oven and place it in the oven to roast. The amount of time you’ll need to cook the chicken will depend on the size of the chicken. A 4 to 5 pound chicken should take at least 1 ½ hours to roast.
When the chicken is finished roasting, it’s time to plate it up. Serve the roasted garlic and herb chicken alongside some roasted potatoes or a fresh salad. The aromas will fill your entire home with a delicious, savory scent.
If you’re ready to start cooking, give this roasted garlic and herb chicken a try. It’s sure to become a favorite. With the help of a cast iron dutch oven, you can easily make a meal that everyone will love. So, grab your cast iron dutch oven and make this roasted garlic and herb chicken for a delicious meal.
Creamy Tomato and Basil Soup
One of the most delicious and hearty cast iron dutch oven recipes is creamy tomato and basil soup. This classic soup is easy to make and requires minimal ingredients, making it the perfect warm meal for any time of the year.
To make the creamy tomato and basil soup, start by heating a tablespoon of olive oil in a cast iron dutch oven over medium-high heat. Once the oil is hot, add in a chopped onion and sauté until the onion is translucent. Next, add in garlic and stir until fragrant. Then, add in one can of crushed tomatoes, a few tablespoons of tomato paste, a tablespoon of Italian seasoning, and a pinch of sugar. Stir everything together and let the tomatoes simmer for about 5 minutes.
Once the tomatoes have simmered, add in a few cups of vegetable broth and bring the mixture to a boil. Once boiling, reduce the heat to a simmer and let the soup cook for about 15 minutes. After the soup has cooked for 15 minutes, stir in a handful of freshly chopped basil leaves. Finally, add in a cup of heavy cream and let the soup simmer for another 5 minutes.
Once the soup is finished cooking, season with salt and pepper to taste. Serve the creamy tomato and basil soup warm with a sprinkle of parmesan cheese and a few extra basil leaves for garnish. This cast iron dutch oven recipe is perfect for chilly days and is sure to become a family favorite. Enjoy!
Cheesy Bacon Mac and Cheese
When it comes to cast iron Dutch oven recipes, one of the most popular dishes is the classic Cheesy Bacon Mac and Cheese. It’s a great comfort food that’s easy to make and always hits the spot. This dish is incredibly versatile, with many variations that can be made to suit any taste.
To start, you will need to get your hands on some good-quality ingredients. For the macaroni, you can use any type of short cut pasta, such as macaroni, shells, or penne. For the cheese, you can use a variety of cheeses, such as cheddar, mozzarella, or parmesan. For the bacon, you can opt for thick-cut or applewood smoked bacon.
Once you have all the ingredients ready, the next step is to heat a cast iron Dutch oven on the stovetop. Start by adding the bacon to the pan and cooking until it is golden and crispy. Then, remove the bacon from the pan and set aside. To the same pan, add the macaroni and cook for a few minutes, stirring occasionally.
Next, add the cheese to the pan and stir until it is completely melted. Once the cheese is melted, add the cooked bacon and stir to combine. Then, season the macaroni and cheese with salt and pepper to taste. Lastly, transfer the macaroni and cheese to a plate and enjoy.
This Cheesy Bacon Mac and Cheese is a great dish to make in your cast iron Dutch oven. It’s perfect for a quick and easy meal and can be customized to suit any taste. The creamy cheese and crispy bacon combine to create a delicious and comforting dish that’s sure to satisfy.
Dutch Oven Pot Roast
The cast iron dutch oven is a staple in many households due to its versatile uses. A dutch oven can be used for a variety of dishes, from soups and stews to roasted meats and vegetables. One of the most popular dishes to make in a dutch oven is a classic pot roast. This meal is sure to bring comfort and savory flavor to your dinner table.
To make a delicious dutch oven pot roast, begin by searing the meat on all sides in a hot cast iron skillet. This will help to lock in the flavor and moisture of the roast. Once the meat has been seared, add it to your dutch oven along with some vegetables like onions, carrots, and potatoes. Next, pour a mixture of beef broth and red wine over the roast and vegetables. Finally, cover the dutch oven and transfer to a preheated oven set to 350 degrees.
Allow the pot roast to cook in the oven for 3-4 hours, checking periodically to make sure the roast does not overcook. If the vegetables begin to overcook, reduce the oven temperature to 325 degrees. When the roast is tender and the vegetables are cooked through, turn the oven off and allow the roast to rest in the oven for an additional 10-15 minutes.
Once the roast is done cooking, remove the dutch oven from the oven and transfer the roast and vegetables to a serving platter. Utilizing the flavorful juices from the dutch oven, make a gravy to serve with the pot roast. To make the gravy, pour the juices into a saucepan and bring to a boil. Whisk together a mixture of cornstarch and cold water and add it to the saucepan. Reduce the heat and allow the gravy to simmer until it thickens. Serve the pot roast with the vegetables and gravy, and enjoy!
If you’re looking for a simple and flavorful meal, try making a dutch oven pot roast. The key to a successful pot roast is to make sure the vegetables and meat cook evenly in the dutch oven. Also, make sure to keep the oven temperature at a consistent level to ensure that the roast does not dry out or overcook. With these tips in mind, you’ll be able to create a mouthwatering cast iron dutch oven pot roast that your family will enjoy.
Braised Short Ribs
Braised short ribs are a comforting, savory dish that can be cooked in a variety of ways. It can be cooked in a slow cooker, an Instant Pot, a pressure cooker, or a cast iron Dutch oven. In this post, we’ll focus on braised short ribs cooked in a cast iron Dutch oven, as it delivers the most flavor and texture.
To make braised short ribs in a cast iron Dutch oven, you’ll need the following ingredients: short ribs, onions, garlic, beef broth, carrots, celery, tomato paste, thyme, bay leaves, and a few tablespoons of olive oil. Start by seasoning the short ribs generously with salt and pepper. Heat the olive oil in the Dutch oven over medium-high heat, then add the short ribs and brown them on all sides. Remove the short ribs from the pot and set aside.
Next, add the onions to the pot and cook until softened. Add the garlic and cook for another minute or two. Then, add the beef broth and scrape up any browned bits from the bottom of the pot. Return the short ribs to the pot and submerge them in the liquid. Add the carrots, celery, tomato paste, thyme, and bay leaves. Bring the liquid to a boil, then reduce the heat to low and cover the pot with the lid.
Allow the short ribs to braise in the Dutch oven for about three hours, stirring occasionally. The ribs should be fork-tender when they’re finished. If the liquid gets too thick, add a little more beef broth to thin it out. When the short ribs are finished, remove them from the pot and serve with your favorite sides.
Braised short ribs cooked in a cast iron Dutch oven are sure to be a hit at your next family dinner. The rich flavor of the braising liquid will add depth and complexity to your meal, while the fork-tender meat will make the dish truly succulent and delicious. Serve these braised short ribs with a variety of sides, such as mashed potatoes, roasted vegetables, or crusty bread. Enjoy!
Mexican-Style Braised Pork
Mexican-Style Braised Pork is an incredibly flavorful and comforting dish to make in your cast iron dutch oven. Pork shoulder is braised in a blend of tomatoes, garlic, chilies, cumin, and oregano. The meat is cooked until it is meltingly tender and the sauce is thick and rich.
To prepare this Mexican-Style Braised Pork, you will need a few simple ingredients – pork shoulder, onion, garlic, canned tomatoes, chili powder, cumin, oregano, and chicken stock. Heat a tablespoon of oil in the cast iron dutch oven and brown the pork shoulder all over. Add the onions and garlic and sauté until lightly browned.
Add the canned tomatoes, chili powder, cumin, oregano, and chicken stock to the pot and bring to a boil. Reduce the heat and simmer for 1-2 hours, or until the pork is tender and the sauce has thickened. Serve the Mexican-Style Braised Pork with warm tortillas and your favorite toppings.
Not only is Mexican-Style Braised Pork a delicious dish, but it is also incredibly easy to make in your cast iron dutch oven. Not only does the cast iron help to evenly distribute the heat, but it also helps to create an incredibly flavorful and rich sauce. The pork shoulder is cooked until it is meltingly tender and the sauce thick and fragrant.
Mexican-Style Braised Pork is a simple yet delicious dish that is sure to be a hit at your next gathering. The pork is flavorful and comforting and the sauce is thick and rich. Serve it with warm tortillas and your favorite toppings and enjoy a delicious cast iron dutch oven meal.
Conclusion
Having delved into the world of cast iron Dutch oven cooking, you now have the knowledge and confidence to create your own delicious and succulent meals. From cooking a classic casserole to creating a show-stopping soufflé, the possibilities are endless. With the right ingredients and a little bit of practice, you can master the art of creating delicious dishes with a cast iron Dutch oven.
The key to success with a Dutch oven is to experiment with different recipes and to use the right techniques. By mastering the basics of cast iron Dutch oven cooking, you’ll be able to make all kinds of delicious dishes with ease. To get you started, here are seven mouthwatering cast iron Dutch oven recipes that you can try now:
1. Dutch Oven Chicken and Rice – This hearty and flavorful dish is a great choice for dinner. The chicken is cooked to perfection in a rich and savory sauce, while the rice soaks up all the delicious flavors.
2. Dutch Oven Lasagna – This classic Italian dish is a favorite in many households, and it’s easy to make in a Dutch oven. Layer the ingredients, bake, and then top with cheese for a delicious meal.
3. Dutch Oven Chili – This one-pot dish is a delicious way to warm up on a cold night. The combination of tomatoes, beans, spices, and ground beef creates a comforting and flavorful chili that’s sure to be a hit.
4. Dutch Oven Beef Stew – A classic comfort food that’s easy to make in a Dutch oven. Get the best flavor and texture by cooking the beef slowly and adding the vegetables at the end of the cooking time.
5. Dutch Oven Pizza – This creative twist on pizza uses a Dutch oven to cook the pizza dough and toppings. The result is a delicious and unique pizza that’s sure to be a hit with the whole family.
6. Dutch Oven Pot Roast – This no-fuss dinner is a great way to feed a crowd. The combination of beef, vegetables, and spices creates a flavorful and tender pot roast that’s sure to please.
7. Dutch Oven Bread – You don’t have to be a master baker to make delicious homemade bread. A Dutch oven is the perfect tool for creating a beautiful, crusty loaf of bread with ease.
These seven cast iron Dutch oven recipes are certain to become favorites in your kitchen. With the right ingredients and a little bit of practice, you’ll be able to create delicious and succulent meals with ease. So get cooking today and enjoy the amazing flavors of a cast iron Dutch oven.
Building Chicken Coops the Easy Way
There are thousands of plans, designs and ideas for buildings used in housing chickens. They range from elaborate two story structures right on down to a small doghouse type dwelling surrounded by a few feet of chicken wire. Before you invest a lot of money and time setting up costly coops, learn about building chicken coops the easy way and you can enjoy the fruits of your labor sooner.
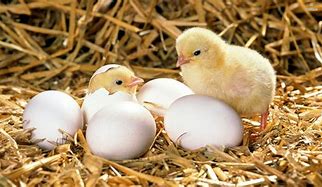
Chickens are not demanding critters. Their needs are pretty basic. They need a place to get in out of the elements where the freezing weather won’t harm their eggs. Next on the list, they have to have space for their nests in order to lay eggs.
Since both eggs and chickens are considered tasty morsels by a wide variety of predators, the place built for chickens needs to be sturdy and well protected. Add a little food and water and they’re happy campers.
There are standard ways to build a chicken coop or you can create your own from scratch. Decide how large the dimensions should be for the area set aside for the chicken coop.
Take care not to put a chicken coop too close to your home for a couple of reasons. The noise can get pretty loud at times and downwind, a chicken coop doesn’t smell like roses. On the other hand, you don’t want to put the coop too far away either – both for the sake of convenience and so that you can keep an eye out for predators.
No matter how fancy a chicken coop is, don’t forget that it has to be cleaned on a regular basis to cut down on odor and bug infestations. One of the mistakes those new to raising chickens do is they build coops where the floor is completely level.
Isn’t that the way to build a house? Yes, but not a hen house – because when you go to wash it out, all of that stuff will pool right at your feet. Not a pretty thought or sight. Instead, you want to build the floor with a tilt at the back of it.
Building a chicken coop the easy way includes an easy clean up. With a slightly tilted floor at the rear of the house, when you spray it down during cleaning, all that icky stuff will wash down the slant and right out the back door of the coop.
Put a chicken wire fence all around the coop to keep unwelcome guests out. Remember that some animals will dig beneath fences to get into the chicken coop, so play it smart and bury the fence partly below the ground. Building chicken coops the easy way makes the work of owning chickens easier in the long run.
Building Chicken Coops the Easy Way
There are thousands of plans, designs and ideas for buildings used in housing chickens. They range from elaborate two story structures right on down to a small doghouse type dwelling surrounded by a few feet of chicken wire. Before you invest a lot of money and time setting up costly coops, learn about building chicken coops the easy way and you can enjoy the fruits of your labor sooner.
Chickens are not demanding critters. Their needs are pretty basic. They need a place to get in out of the elements where the freezing weather won’t harm their eggs. Next on the list, they have to have space for their nests in order to lay eggs.
Since both eggs and chickens are considered tasty morsels by a wide variety of predators, the place built for chickens needs to be sturdy and well protected. Add a little food and water and they’re happy campers.
There are standard ways to build a chicken coop or you can create your own from scratch. Decide how large the dimensions should be for the area set aside for the chicken coop.
Take care not to put a chicken coop too close to your home for a couple of reasons. The noise can get pretty loud at times and downwind, a chicken coop doesn’t smell like roses. On the other hand, you don’t want to put the coop too far away either – both for the sake of convenience and so that you can keep an eye out for predators.
No matter how fancy a chicken coop is, don’t forget that it has to be cleaned on a regular basis to cut down on odor and bug infestations. One of the mistakes those new to raising chickens do is they build coops where the floor is completely level.
Isn’t that the way to build a house? Yes, but not a hen house – because when you go to wash it out, all of that stuff will pool right at your feet. Not a pretty thought or sight. Instead, you want to build the floor with a tilt at the back of it.
Building a chicken coop the easy way includes an easy clean up. With a slightly tilted floor at the rear of the house, when you spray it down during cleaning, all that icky stuff will wash down the slant and right out the back door of the coop.
Put a chicken wire fence all around the coop to keep unwelcome guests out. Remember that some animals will dig beneath fences to get into the chicken coop, so play it smart and bury the fence partly below the ground. Building chicken coops the easy way makes the work of owning chickens easier in the long run.

Buy a Rabbit Hutch and Run Together to Save Money
Your pet bunny will need a rabbit hutch and run so that he can have both the comfort and the exercise he needs. If you buy both together, you’ll end up saving money in the long run.
Even though many hutches are quite large, for their physical and emotional, rabbits need to be able to move freely about. They need to have that freedom yet at the same time, because they are small animals that can be targets for other animals such as cats or foxes, so they must be protected. They also need that fresh air and sunshine.
It’s never a good idea to let a bunny alone in a yard. Don’t make the mistake of thinking that you can take your pet out of a hutch and turn him loose in a fenced in backyard and he’d be fine.
Predators can get over or under a fence to get to a rabbit. The purpose of a rabbit run is to keep him safe from harm. The run is usually made of wire mesh or chain link fence material. The spaces between the wire are made so that the rabbit can’t get a foot caught up in the wire.
When you get a rabbit hutch and run check with the manufacturer details on the kind of lumber or other materials that were used to make the run. Know ahead of time what’s safe for your bunny to be around and what’s not since some wood is toxic to a rabbit.
A good wood to use in a run is fir wood that’s not been treated with any kind of sealant that has a noxious fume to it. You’ll want the run you purchase to have an access door for you to be able to get to the bunny easily but you’ll want that door to be sturdy enough so that if he pushes against it, the latch won’t spring open.
A run that’s too small defeats the purpose. A good rule of thumb to follow when considering what size run to get is to make sure it’s at least twice the size of a medium hutch, which would be about 36 inches in width.
Some runs come with flooring but most do not which allows owner to simply move the hutch to a new area in the yard if the ground becomes muddy or is no longer suitable for the pet.
Having flooring on a run is a matter of personal preference but being able to nibble on untreated grass and be on a natural setting is more of a treat for the bunny than using synthetic means.
Your pet needs both a rabbit hutch and run already in place before you bring him home. He’ll want to familiarize himself with his surroundings and the sooner he learns he’s home, the more secure he’ll feel. Buying a hutch and run that you can just assembly can give you that convenience factor as well as save you money.
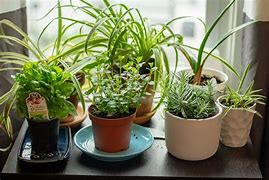
Easy Herbs for Beginning Herb Gardeners
Beginning herb gardeners may worry about which types of herbs they should grow. There are many different herbs available, and some are more difficult to grow than others. There are a few types of herbs that are especially easy to grow for beginners. These are generally more hardy plants that don’t require a lot of fertilizer or special work.
Parsley – Parsley is a relatively hardy annual in zones 2-11. Both flat-leaf and curly varieties are easy to care for and grow very well without a lot of extra care. It can do well in full sun to light shade, and needs rich soil that is well-drained but moist. It doesn’t do particularly well in heat.
Cilantro – Also known as coriander – this annual herb doesn’t need exceptionally rich soil, and isn’t extremely particular about sun and shade. It can do well in full sun or light shade. It is relatively easy to care for, and does well in almost all zones.
Chives – Chives are a perennial herb. Chives can grow well in almost any soil, and almost any conditions. Chives have been known to be seen growing in old gardens that haven’t been tended in many years! It’s hardy in zones 3-9, and prefers full sun. It does do better in rich soils, but doesn’t need it to survive. Chives have a rich, oniony flavor, and they taste great on baked potatoes.
Oregano – This herb is an extremely popular herb, and it goes well with many different types of foods. It is commonly used in tomato-based pasta dishes, chicken dishes, and pork dishes. Hard in zones 5-9, oregano does well in raised beds, rock gardens, alongside roads or pathways, or just about anywhere! It needs full sun and well-drained soil, but it actually does better in poor, rocky soil!
Thyme – Thyme is a perennial herb. It is hardy in zones 4-6. It’s a small, shrub-like herb that requires full sun and moist, well-drained soil. It is quite hardy in its standard zones, and doesn’t require much care at all.
Basil – Basil in a warm-weather annual herb. It is hardy in most zones, but it requires hot, dry conditions to reach peak flavor. It needs full sun, and very rich, moist soil. The only major issues with growing basil are slugs and cool conditions. As long as basil has enough light and heat, and its soil is allowed to dry out between waterings, it usually requires little additional care.
Bay – Although it is a type of shrub, this is actually a very good herb for beginners to grow. It’s hardy in zones 8-11, and is remarkably hardy in those zones. It needs full sun to light shade, and rich, well-drained soil. It will tolerate variations in conditions rather well. Just remember, bay leaves reach their full flavor when dry, so be sure to press them between layers of paper towels inside heavy books for a few weeks before you use them.
Remember to be careful about the zones. Although many of these herbs are hardy, they do much better when kept to their hardiness zones. As long as you grow them in the zones in which they do best, most of these herbs will be very easy to care for, and shouldn’t need a whole lot of extra work to take care of them.

Ten Great Vegetables for Home Vegetable Gardens
It’s sometimes recommended that you don’t try to grow vegetables that are readily available at your local supermarket. If a particular vegetable is inexpensive, you might want to skip growing it and just purchase it.
Of course, it can be difficult to find good quality in some types of vegetables, so if there is a big difference in quality, that could be a great reason for growing that type.
Tomatoes – Although technically a fruit, its savory nature leads to this little beauty being considered a vegetable by most people. Tomatoes found in stores are usually picked nearly green and then ripened artificially.
This is done to ensure they are tough enough to survive shipping without being smashed, and so they last longer on the shelves. Since tomato quality can be really poor in stores, this is a very good choice. Tomatoes are the most popular choice for vegetable gardeners, because they probably have the most noticeable difference over store bought.
Lettuce – Although iceberg lettuce doesn’t very that much from store to home, leaf lettuces and other fancy lettuces can taste much sweeter and crisper if grown at home. Plus, exotic lettuces can often be very expensive.
Peas – Peas can be very hard to find fresh. Canned peas are often mushy, and although frozen peas are certainly better than canned, they still pale in comparison to fresh peas. Tiny baby peas are sweet, delicate, and delicious, making them well worth the effort.
Carrots – Store bought carrots are often woody, tough, and bitter. Even organic carrots often carry a strong bitterness caused by being kept at temperatures that are too cool for too long. Fresh carrots are generally very sweet and delicious.
Radishes – Radishes are cheap and easy to find in stores, but most store bought radishes are already turning pithy. If you’ve ever bitten into a radish that was dry and spongy inside, you’ll understand how bad pithy radishes are. Fresh radishes are delightful!
Greens – Although most greens are readily available in stores, they’re often yellowing and wilted by the time you buy them. By growing them yourself, you can be sure you have fresh greens when you want them.
Asparagus – Fresh asparagus is often ridiculously expensive, and canned asparagus is mushy and horrible! The only way to get affordable asparagus that isn’t mushy and bland is to grow it yourself.
Peppers – Peppers in stores are often shriveled and pathetic. Plus, peppers that aren’t standard green peppers can often be very expensive. My local store has sold red peppers for as much as $2.99 each, which is crazy! Grow your own and save money.
You Can Have Backyard Chicken Coops Even in the City
Have you always wanted to have backyard chicken coops but thought you couldn’t since you live in the city? While there are some cities that don’t allow any type of farm animal, many cities do and you’re allowed to have chickens.
However, some of these cities that allow chickens to be kept do not allow roosters due to the crowing and complaints from neighbors. You’ll want to check with your city to make sure you’re not breaking any animal nuisance laws.
The reasons for keeping chickens vary from wanting fresh eggs to wanting a different kind of pet to desiring a bit of the country in the city. Not only can there be a savings on the grocery bill by producing eggs for family use, but many neighbors are joining together to create chicken projects. They’re splitting costs of the materials to build the backyard chicken coops as well as the cost of the feed and incidentals.
If you figure that you want to have a coop for hens of your own, they’re not at all difficult to build, plus you can design your own plans to make the coop look like a little house or barn rather than the traditional coop you may remember. All it takes is a little planning before you get started.
You’ll need to make sure you plan enough space for each chicken as over crowded conditions can lead to sickness among the chickens. The general rule of thumb for space is to have approximately four square feet of space for each chicken though it never hurts to have more. As you’re building the chicken coop take into consideration the area where you live.
If you live in a northern state where snow and ice are a regular part of the weather, you’re going to need a coop that’s adequately insulated to keep the chickens warm. You don’t want to have to bring them indoors for them to survive. If you happen to live in an area where the winters are not as harsh, but the summers are scorchers, you’ll have to make sure the coop is built to provide maximum cooling.
When building the home for your chickens, you don’t have to spend a lot of money buying brand new materials. You can build it from recycled materials, such as wood left over from a home project – even hinges salvaged from old kitchen or bathroom makeovers can be put to use as hinges for a chicken coop door.
Whatever materials you use to build your backyard chicken coops, make sure you’ve provided good ventilation in the snug home for your chickens otherwise you can get an ammonia build up that’s not good for you or the chickens.